Recent Water Damage Posts
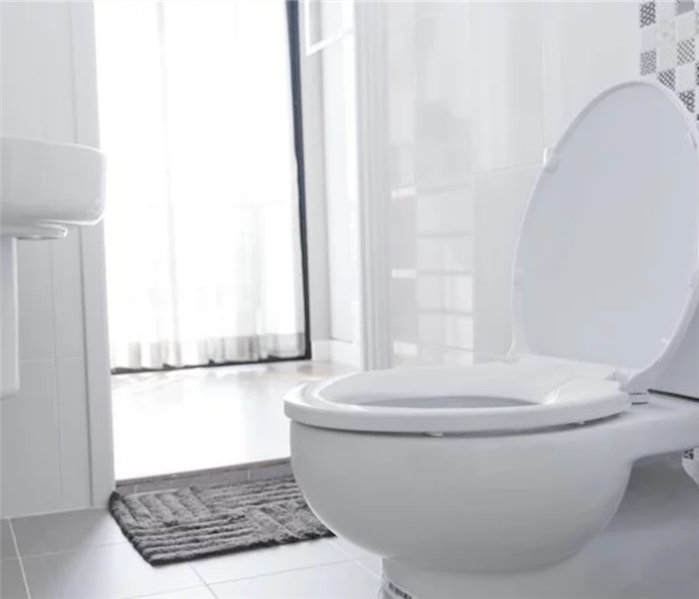
Here Are Tips on How to Stop Leaking Toilets
7/13/2023 (Permalink)
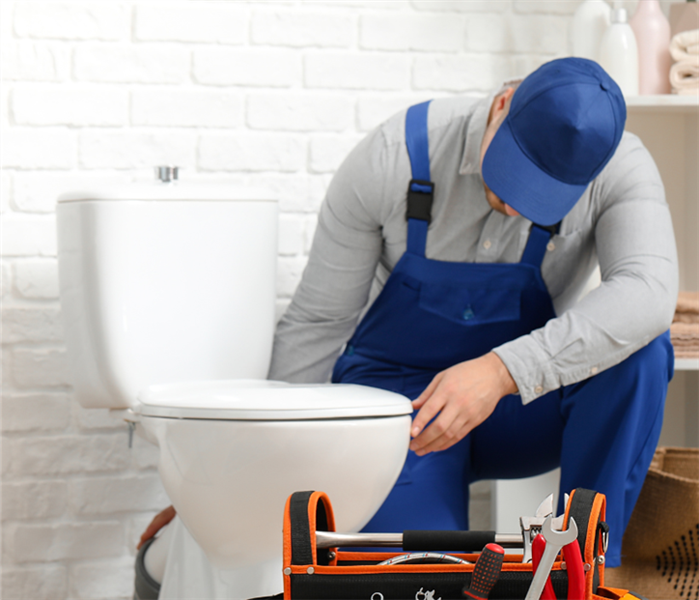 Man fixing toilet.
Got a leaky toilet? Believe it or not, it’s a common problem. Continue reading to find out the likeliest causes and the easiest ways to remedy the situation.
First, some of the washers between the bowl and tank may have failed. Shut off the supply valve, empty the tank with a flush, then remove the nuts, bolts, and washers from the underside of the tank. Lift the tank, position it on its side, and see if the washers need replacing.
Another culprit may be faulty fasteners securing the fill valve and ballcock to the bottom of the tank. Before you replace those parts, however, first try simply tightening the nuts and bolts holding them in place—that often solves the problem.
On the other hand, if the leak seems to be coming from the base of the tank, chances are the wax ring that seals the toilet to the floor has failed. Replacing the wax ring is a much bigger job, since it involves removing the entire toilet from its base. If you decide to replace the wax ring yourself—preferably with a friend to help with the lifting—take the extra step of also replacing any bolts that show signs of corrosion. And, once you have the toilet back in place, don’t forget to add a bead of caulk around the base.
Source: https://www.bobvila.com/articles/toilet-leaking/#.Wnxo75M-e35
Here Are Tips on How to Stop Leaking Toilets
7/13/2023 (Permalink)
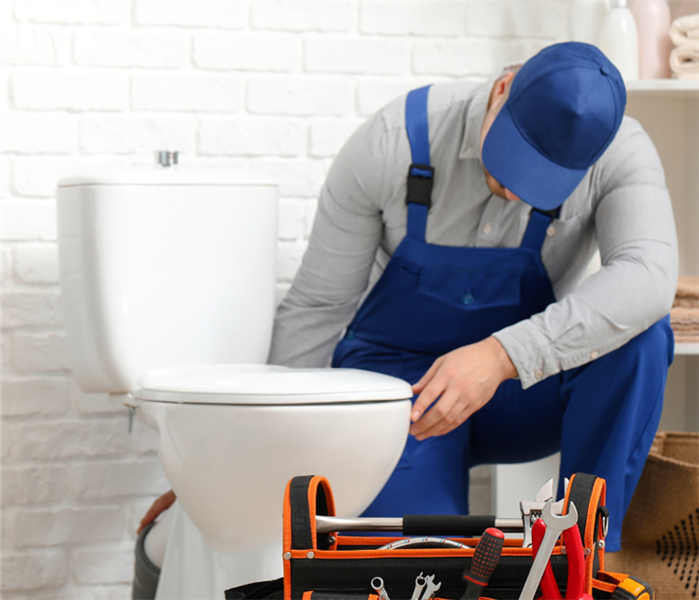 Man fixing toilet.
Got a leaky toilet? Believe it or not, it’s a common problem. Continue reading to find out the likeliest causes and the easiest ways to remedy the situation.
First, some of the washers between the bowl and tank may have failed. Shut off the supply valve, empty the tank with a flush, then remove the nuts, bolts, and washers from the underside of the tank. Lift the tank, position it on its side, and see if the washers need replacing.
Another culprit may be faulty fasteners securing the fill valve and ballcock to the bottom of the tank. Before you replace those parts, however, first try simply tightening the nuts and bolts holding them in place—that often solves the problem.
On the other hand, if the leak seems to be coming from the base of the tank, chances are the wax ring that seals the toilet to the floor has failed. Replacing the wax ring is a much bigger job, since it involves removing the entire toilet from its base. If you decide to replace the wax ring yourself—preferably with a friend to help with the lifting—take the extra step of also replacing any bolts that show signs of corrosion. And, once you have the toilet back in place, don’t forget to add a bead of caulk around the base.
Source: https://www.bobvila.com/articles/toilet-leaking/#.Wnxo75M-e35
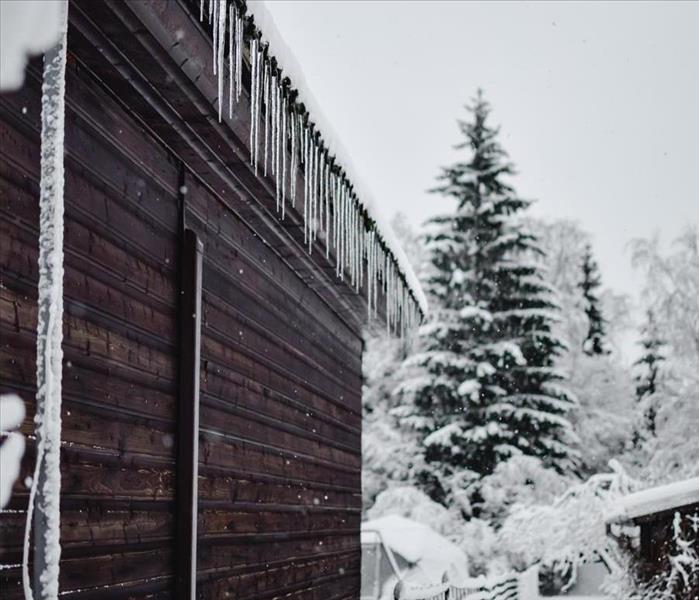
With These 7 Steps Prepare Your Plumbing for Winter
7/13/2023 (Permalink)
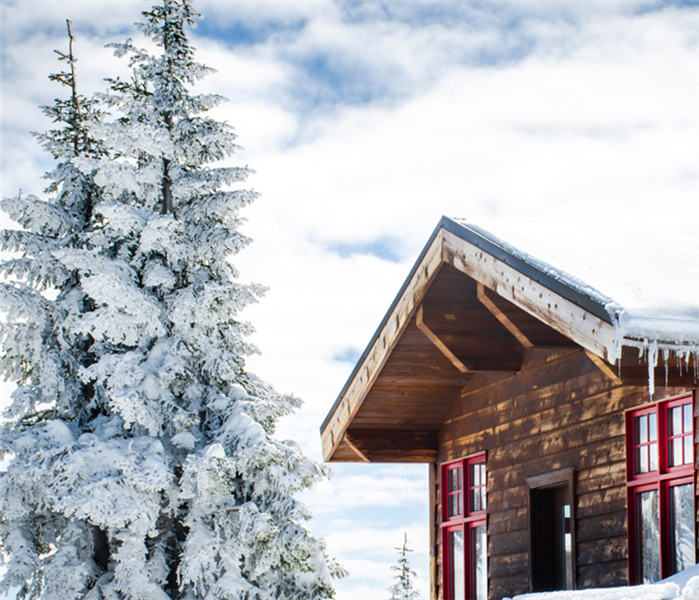 Cabin house frozen in winter.
Simple Steps to Prepare Your Plumbing for Winter
Have you prepared your plumbing for winter? Damage caused from burst pipes can cost you thousands, of dollars. Not all damage is covered by homeowner’s insurance. We want to make sure you know some simple steps to get you prepared. Follow these 7 simple steps to get off to a great start. Find yourself in a bind? Brogdon Plumbing is here to help! Give us a call.
- Prepare your outdoor faucets. Remove and drain your water hoses and store them indoors before the first freeze.
- Fix leaks now. Inspect your pipes and have any/all leaks repaired.
- Wrap any pipes in unheated areas of the home. This is crucial, for mobile homes. Visit the hardware store and grab some heat tape and/or pipe insulation. There are also easy to install kits, that include a thermostat. These kits can help you in the event of frigid temps for long periods. Don’t hesitate to ask an employee for recommendations. Protecting the pipes in your home, from low temperatures is THE single most important thing that you can do.
- Tune up your water heater. You will want to drain and maintain your water heater at this time every year. It’s a little harder to do yourself but we are glad to help! Just give us a call.
- Service your furnace. Make sure you have clean filters and call a professional to help with major repairs. Heat means pipes could freeze. If they do, call us!
- Selling your home or heading south for winter? Shut off the water, in your home, completely and consider contacting us to drain your pipes. Any water left in your pipes is at risk of freezing and causing pipes to bust. If nobody is home, the damage can be widespread and severe. Don’t take chances.
- Call Brogdon plumbing! If you have questions or concerns, contact us for help. We will gladly help with your winter pipe preparations!
What else can you do to prepare your plumbing for winter? Share your personal tips/tricks with us.
Source: http://www.brogdonplumbing.com/prepare-plumbing-for-winter/
Is There Water Damage In Your Office?
6/29/2023 (Permalink)
If you have ever faced water damage in your office, you may have some bad memories that accompany that instance. For example, you may have lost copiers, files, furniture, and a manner of other items of value due to water damage. You may have even had to close the doors of your business if you're a business owner, or if you're an employee, you may have had a period where you weren't able to work.
This water damage could have been a result of a leaky window, roof, or wall, or it could have been a plumbing malfunction or problem. Regardless how it happened, it more than likely caused a pretty big headache.
After the initial water intrusion problem was resolved, you may have had to deal with mold growth and other devastating effects of water damage in your office. So, what can you do to be better prepared in the event that your office was ever hit with water damage again?
First things first. With today's technological advancements, it's a great idea to back-up files and other hard-copy paper files to more than one location. Also, it's a great idea to stay up-to-date on your equipment warranties as well as renter's or owner's insurance on the office itself. If you have the ability to, it's also a great idea to work out a "Plan B" location for your co-workers or employees to meet in the event of office damage in the future. The possibility for remote work is far more probable now than in recent years.
Next, it's important to have a professional water damage and mold remediation team on hand that you can count on. You never know when water damage might strike your office, so knowing that you have a team of professionals on-call and ready to help should give you immense peace of mind going forward. You want someone to show up when you call with full confidence that your problem will be resolved quickly and efficiently.
Our local SERVPRO team is ready to help in the event a disaster like water damage were to strike you. Our team is more than capable to take care of your problems - large or small. You can count on us!
Is Water Leaking? Here's What To Do
6/29/2023 (Permalink)
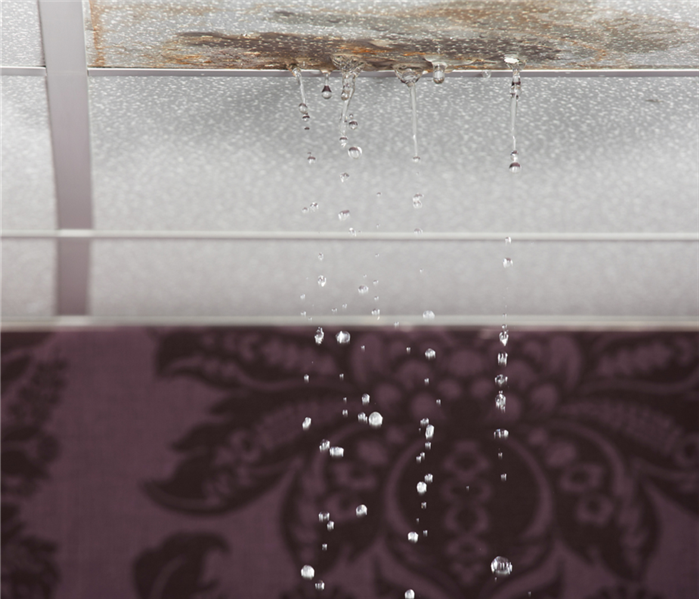 Water leaking through the ceiling.
It happens to everyone. A toilet. A leaky faucet. A busted pipe. Hey, it's manmade and we know that it breaks. The question, however, is what actions do we take first.
1. Find and shut off the water source. No matter where it is, find it and stop it. Even if that means bringing in the professionals.
2. Turn off all the circuit breakers. You never know where that water has traveled or is. The last thing you want to do is electrocute yourself.
3. Now try and move as much water as possible.
4. Removed and prop up wet upholstery so it can dry.
5. Try and remove as much valuable stuff to a dry safe area.
6. Take pictures of everything.
7. Contact your insurance agent and SERVPRO.
Also, don't try and dry it with your fans or vacuum cleaners. That is only going to make things worse and cost you a new vac. Call us and our professionals can handle the hard parts.
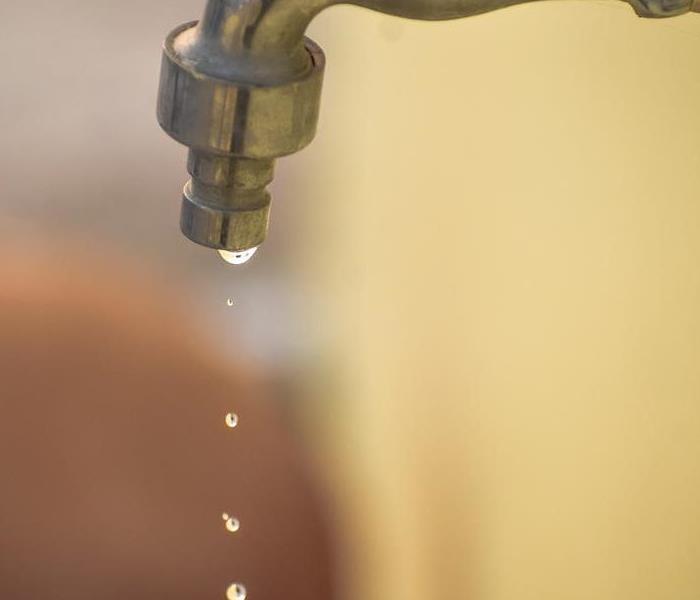
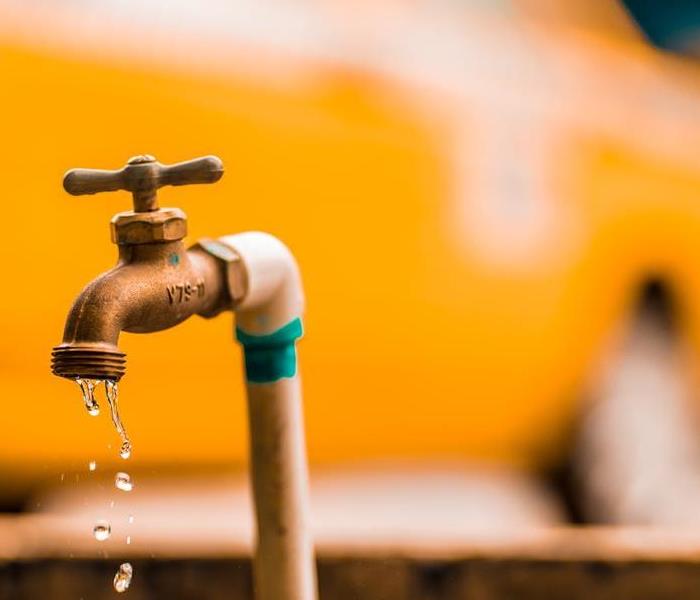
Water Leaks: What to Do First
12/12/2022 (Permalink)
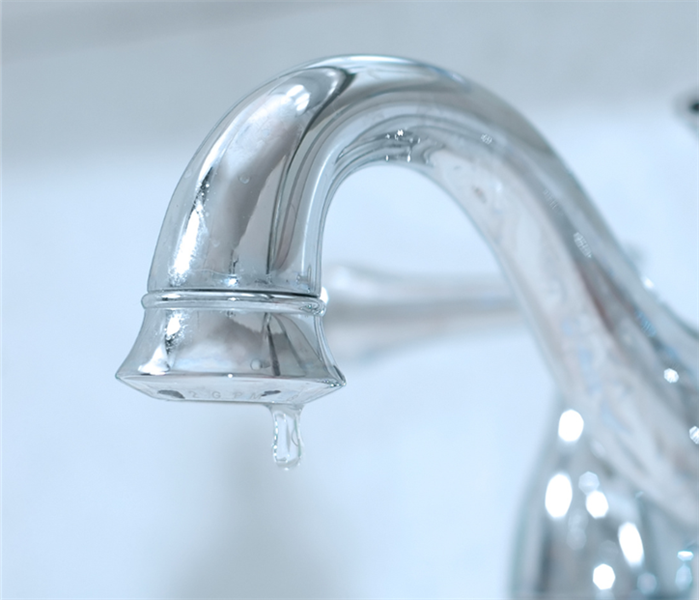 Water leaking from a faucet.
It happens to everyone. A toilet. A leaky faucet. A busted pipe. Hey, it's manmade and we know that it breaks. The question, however, is what actions do we take first.
- Find and shut off the water source. No matter where it is, find it and stop it even if that means bringing in professionals.
- Turn off all the circuit breakers. You never know where that water has traveled or is. The last thing you want to do is electrocute yourself.
- Now try and move as much water as possible.
- Remove and prop up wet upholstery so it can dry.
- Try and remove as much valuable stuff to a dry safe area.
- Take pictures of everything.
- Contact your insurance agent and SERVPRO.
Also, don't try and dry it with your fans or vacuum cleaners. That is only going to make things worse and cost you a new vac. Call us, and our professionals can handle the hard parts.
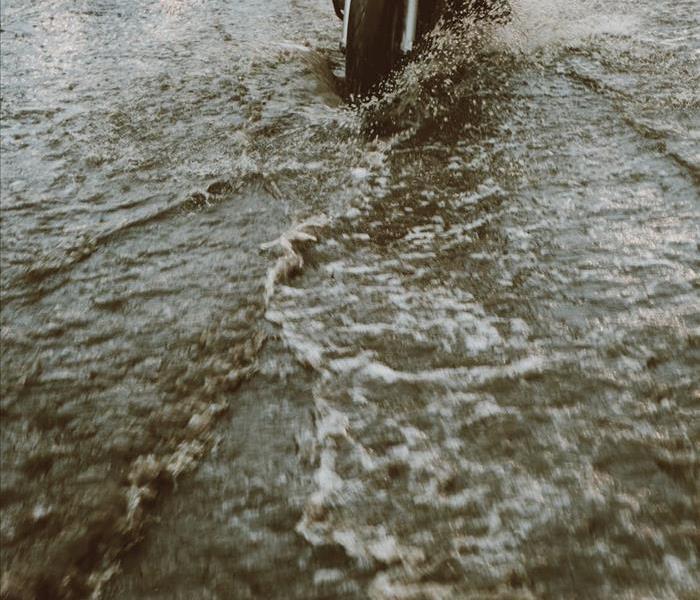
Flood Safety Tips
12/12/2022 (Permalink)
 Street flooding and people trying to drive.
- Evacuate immediately, if told to evacuate. Never drive around barricades. Local responders use them to safely direct traffic out of flooded areas.
- Contact your healthcare provider If you are sick and need medical attention. Wait for further care instructions and shelter in place, if possible. If you are experiencing a medical emergency, call 9-1-1.
- Listen to EAS, NOAA Weather Radio or local alerting systems for current emergency information and instructions regarding flooding.
- Do not walk, swim or drive through flood waters. Turn Around. Don’t Drown!
- Stay off bridges over fast-moving water. Fast-moving water can wash bridges away without warning.
- Stay inside your car if it is trapped in rapidly moving water. Get on the roof if water is rising inside the car.
- Get to the highest level if trapped in a building. Only get on the roof if necessary and once there signal for help. Do not climb into a closed attic to avoid getting trapped by rising floodwater.
Prepare Your Plumbing for Winter With These 7 Steps
7/14/2022 (Permalink)
 Cabin house frozen in winter.
Simple Steps to Prepare Your Plumbing for Winter
Have you prepared your plumbing for winter? Damage caused from burst pipes can cost you thousands, of dollars. Not all damage is covered by homeowner’s insurance. We want to make sure you know some simple steps to get you prepared. Follow these 7 simple steps to get off to a great start. Find yourself in a bind? Brogdon Plumbing is here to help! Give us a call.
- Prepare your outdoor faucets. Remove and drain your water hoses and store them indoors before the first freeze.
- Fix leaks now. Inspect your pipes and have any/all leaks repaired.
- Wrap any pipes in unheated areas of the home. This is crucial, for mobile homes. Visit the hardware store and grab some heat tape and/or pipe insulation. There are also easy to install kits, that include a thermostat. These kits can help you in the event of frigid temps for long periods. Don’t hesitate to ask an employee for recommendations. Protecting the pipes in your home, from low temperatures is THE single most important thing that you can do.
- Tune up your water heater. You will want to drain and maintain your water heater at this time every year. It’s a little harder to do yourself but we are glad to help! Just give us a call.
- Service your furnace. Make sure you have clean filters and call a professional to help with major repairs. Heat means pipes could freeze. If they do, call us!
- Selling your home or heading south for winter? Shut off the water, in your home, completely and consider contacting us to drain your pipes. Any water left in your pipes is at risk of freezing and causing pipes to bust. If nobody is home, the damage can be widespread and severe. Don’t take chances.
- Call Brogdon plumbing! If you have questions or concerns, contact us for help. We will gladly help with your winter pipe preparations!
What else can you do to prepare your plumbing for winter? Share your personal tips/tricks with us.
Source: http://www.brogdonplumbing.com/prepare-plumbing-for-winter/
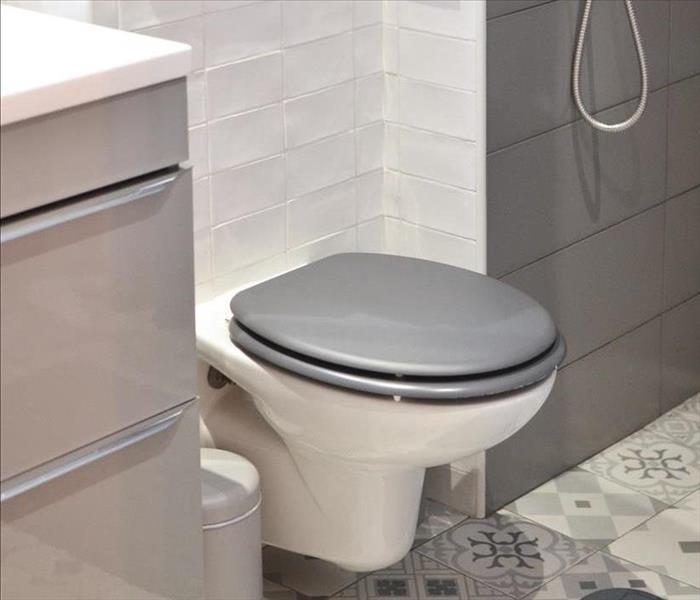
Leaky Toilet? Here Are Tips on How to Stop It
7/14/2022 (Permalink)
 Tips on Stopping a Leaky Toilet
Got a leaky toilet? Believe it or not, it’s a common problem. Continue reading to find out the likeliest causes and the easiest ways to remedy the situation.
First, some of the washers between the bowl and tank may have failed. Shut off the supply valve, empty the tank with a flush, then remove the nuts, bolts, and washers from the underside of the tank. Lift the tank, position it on its side, and see if the washers need replacing.
Another culprit may be faulty fasteners securing the fill valve and ballcock to the bottom of the tank. Before you replace those parts, however, first try simply tightening the nuts and bolts holding them in place—that often solves the problem.
On the other hand, if the leak seems to be coming from the base of the tank, chances are the wax ring that seals the toilet to the floor has failed. Replacing the wax ring is a much bigger job, since it involves removing the entire toilet from its base. If you decide to replace the wax ring yourself—preferably with a friend to help with the lifting—take the extra step of also replacing any bolts that show signs of corrosion. And, once you have the toilet back in place, don’t forget to add a bead of caulk around the base.
Source: https://www.bobvila.com/articles/toilet-leaking/#.Wnxo75M-e35
What To Do When Water Leaks
7/1/2022 (Permalink)
 Faucet leaking water.
It happens to everyone. A toilet. A leaky faucet. A busted pipe. Hey its manmade and we know that it breaks. The question however, is what actions do we take first.
1. Find and shut of the water source. Now mater where it is, find it and stop it. Even if that means bringing in the professionals.
2. Turn off all the circuit breakers. You never know where that water has traveled or is. Last thing you want to do is electrocute yourself.
3. Now try and move as much water as possible.
4. Removed and prop up wet upholstery so it can dry.
5. Try and remove as much valuable stuff to a dry safe area.
6. Take pictures of everything.
7. Contact your insurance agent and SERVPRO.
Also don't try and dry it with your fans or vacuum cleaners. That is only going to make things worse and cost you a new vac. Call us and our professionals can handle the hard parts.
Does Your Office Have Water Damage?
7/1/2022 (Permalink)
If you have ever faced water damage in your office, you may have some bad memories that accompany that instance. For example, you may have lost copiers, files, furniture, and a manner of other items of value due to water damage. You may have even had to close the doors of your business if you're a business owner, or if you're an employee, you may have had a period where you weren't able to work.
This water damage could have been a result of a leaky window, roof, or wall, or it could have been a plumbing malfunction or problem. Regardless how it happened, it more than likely caused a pretty big headache.
After the initial water intrusion problem was resolved, you may have had to deal with mold growth and other devastating effects of water damage in your office. So, what can you do to be better prepared in the event that your office was ever hit with water damage again?
First things first. With today's technological advancements, it's a great idea to back-up files and other hard-copy paper files to more than one location. Also, it's a great idea to stay up-to-date on your equipment warranties as well as renter's or owner's insurance on the office itself. If you have the ability to, it's also a great idea to work out a "Plan B" location for your co-workers or employees to meet in the event of office damage in the future. The possibility for remote work is far more probable now than in recent years.
Next, it's important to have a professional water damage and mold remediation team on hand that you can count on. You never know when water damage might strike your office, so knowing that you have a team of professionals on-call and ready to help should give you immense peace of mind going forward. You want someone to show up when you call with full confidence that your problem will be resolved quickly and efficiently.
Our local SERVPRO team is ready to help in the event a disaster like water damage were to strike you. Our team is more than capable to take care of your problems - large or small. You can count on us!
What to Do When You First See A Water Leak
12/12/2021 (Permalink)
 Water leaking from a faucet.
It happens to everyone. A toilet. A leaky faucet. A busted pipe. Hey its manmade and we know that it breaks. The question however, is what actions do we take first.
1. Find and shut of the water source. Now mater where it is, find it and stop it. Even if that means bringing in the professionals.
2. Turn off all the circuit breakers. You never know where that water has traveled or is. Last thing you want to do is electrocute yourself.
3. Now try and move as much water as possible.
4. Removed and prop up wet upholstery so it can dry.
5. Try and remove as much valuable stuff to a dry safe area.
6. Take pictures of everything.
7. Contact your insurance agent and SERVPRO.
Also don't try and dry it with your fans or vacuum cleaners. That is only going to make things worse and cost you a new vac. Call us and our professionals can handle the hard parts.
How To Stay Safe In During A Flood.
12/12/2021 (Permalink)
 Street flooding and people trying to drive.
- Evacuate immediately, if told to evacuate. Never drive around barricades. Local responders use them to safely direct traffic out of flooded areas.
- Contact your healthcare provider If you are sick and need medical attention. Wait for further care instructions and shelter in place, if possible. If you are experiencing a medical emergency, call 9-1-1.
- Listen to EAS, NOAA Weather Radio or local alerting systems for current emergency information and instructions regarding flooding.
- Do not walk, swim or drive through flood waters. Turn Around. Don’t Drown!
- Stay off bridges over fast-moving water. Fast-moving water can wash bridges away without warning.
- Stay inside your car if it is trapped in rapidly moving water. Get on the roof if water is rising inside the car.
- Get to the highest level if trapped in a building. Only get on the roof if necessary and once there signal for help. Do not climb into a closed attic to avoid getting trapped by rising floodwater.
(source: https://www.ready.gov/floods)
How to prevent water damage from swimming pools.
6/4/2021 (Permalink)
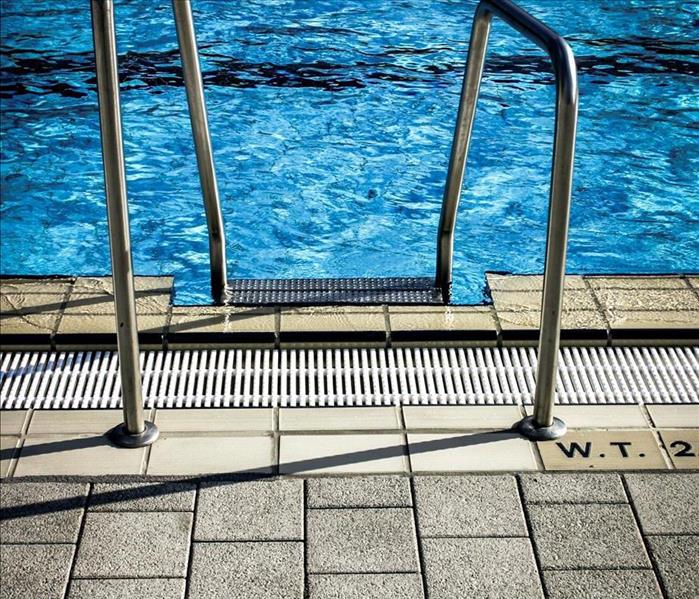 Swimming Pool filled with water that could overflow and cause water damage.
What causes a swimming pool to overflow
What causes a swimming pool to overflow? If you have an under- or over-rated pump, it could trigger the overflow. Water and chemicals in soil that drains slowly could cause an overflow. If you have a small pool and have used too much chlorine, there is the problem. The chemicals used can cause a chemical reaction that is not easily detected
How to care and maintain a swimming pool
How to care and maintain a swimming pool properly.
We don’t just take swimming pools for granted though. After all, they are quite vital for one’s well being and are used quite often day and night. Unfortunately though, when they dry up, they can quickly fill with water and become unusable as well as costing a lot
What to do if your swimming pool overflows.
What to do if your swimming pool overflows.
The answer
It is not really a question of what one can do about an overflow, but rather more of an awareness of a possible failure on your part. In the first instance of an over-flowing, it is likely that the main cause exists is your pool emptying slowly and evenly.
If you are not careful, eventually this will lead to water damage.
Water leaks can cause major water damage.
6/3/2021 (Permalink)
 Water leak from pipes.
Check for water leaks:
Check for water leaks, cracks and damp spots as early as possible
Water leaks and damage are a significant cause of dampness and corrosion. So, you need to check on them regularly.
Water leaks are common and people are usually aware of them because they see water seeping from something. They check for water leaks just to make the problem go away.
But, often they don’t do enough to avoid the damage and costs, or they do it late. The damage and costs can also happen if you fail to notice a leak too early.
Check on the signs of water leaks and damp spots as early as possible, so that they don’t cause damage:
A leak causes water to come from the outside, which can cause dampness and wetness inside. Check for cracks and damp spots near the location of the water leak.
Often people don’t check pipes for the holes that connect them.
You should check the pipe on each side and inside, so that you find the problem. A hole inside the pipe usually mean that someone damaged it. You can use your flashlight to check for that.
What kind of damage is caused by water leaks:
what kind of damage is caused by water leaks? What is the cost of repairs? Find out what causes water damage and what to do in case of water leakage in your home.
What causes a water leak? What happens when the pipe or pipe system is broken? Find out the causes for water damage in your home and what to do to avoid having to fix it or paying for it.
Water damage and how to avoid it - it's time to make your home, office or home and car as resistant to the effects of water as possible!
What is Water Leakage and Is It a Threat to Your Home?
The most dangerous hazard threatening your home is the one related to water. If you want to protect that living space from water, it is of the utmost importance that you follow all of the following tips:
If you have a pipe that leaks, you should know that any small leak inside your house, is a threat to the safety of anyone who's inside it. However, there is one exception to the rule of leaks causing major damage:
This exception occurs with the pipe inside the walls of your house. The temperature in the pipes inside the walls will become higher over time. When the pipes in your walls are installed in
How to fix water leaks:
how to fix water leaks
Solutions designed to keep your home and personal belongings protected when the rain falls.
A strong wall keeps a home and belongings secure. But those bricks and mortar are a lot of weight that can crack over time. In addition, water will seep into those joints and weaken them. We’ve broken a window and a door as a result of water going in and dampness. One of the best solutions to mitigate water infiltration into home and belongings is to fill the space around a wall or door with a water-resistant product.
That water-resistant product is the waterproofing sealer. It can be added directly to the concrete or brick surface, or it can be mixed into a liquid waterproofing mix for application in other applications. Even if your home does sustain water damage, you need to add a water-resistant sealer to keep water from getting inside your home. The next time the roofer installs your new sheeting and siding, make sure to add a waterproofing sealer to the newly-applied material’s surface. This will protect you and your belongings in the future, and it will prevent water damage to your home in the meantime.
In the event you do have leaks and need help. Call SERVPRO.
Mold 101
10/9/2019 (Permalink)
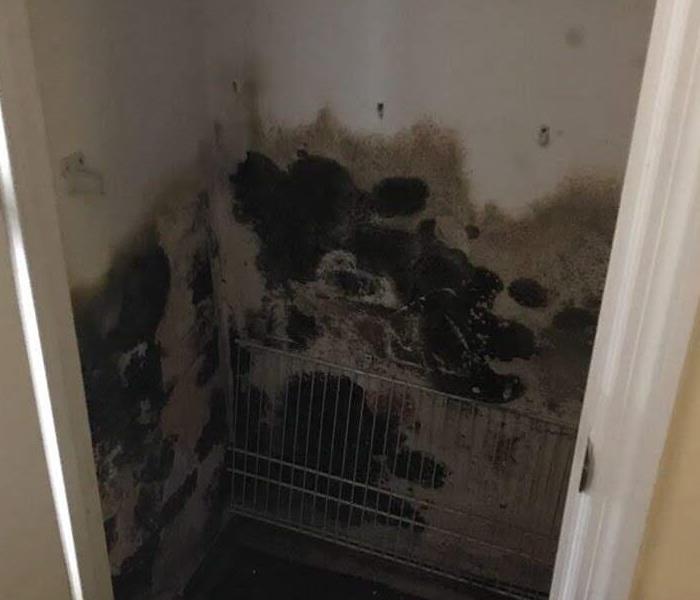
Water damage is known for the havoc it can wreak on a property of any kind. Most of the time, significant water damage will lead to some sort of mold development and growth if the initial water problem isn't resolved. So, if you have come face to face with water damage in the past and are dealing with mold issues now, what can you expect? What are some do's and don'ts associated with mold? Check out the information below.
If you see visible mold, do not disturb it. You can inadvertently spread the mold infestation throughout your home. When mold is disturbed, the mold can release microscopic mold spores which become airborne and can circulate inside your home.
What to Do:
- DO stay out of affected areas entirely. This goes for your pets also.
- DO turn off the HVAC system and fans. The more air circulation in your home or office, the higher chance that you may inhale some of the spores.
- DO contact SERVPRO of McMinn, Monroe, and Polk Counties for mold remediation services immediately.
What Not to Do:
- Do NOT touch or disturb the mold. If possible, leave the premises entirely until the remediation is complete.
- Do NOT blow air across any surfaces with visible or suspected mold growth.
- Do NOT attempt to dry the area yourself. Stay away and let the professionals take care of it.
- Do NOT spray bleach or other disinfectants on the mold. This may only make the situation worse and can cause bad chemical reactions.
We are prepared to help you face this issue when it arises. Our team is prepared to deal with microbial growth and will help you take care of this issue quickly.
If you have any questions about microbial growth or have any concerns about your home or business, let SERVPRO of McMinn, Monroe, and Polk Counties put your mind at ease. Call us today at (423) 745-4165 for any mold or mildew issues you are dealing with in your home or business due to water damage!
Preparing Your Home's Plumbing For Winter
10/4/2019 (Permalink)
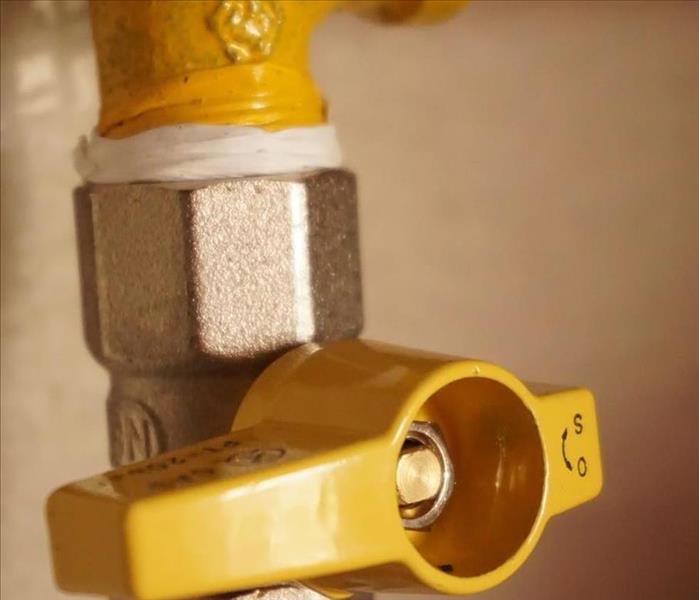 Yellow plumbing pipe with valve closed.
Have you prepared your plumbing for winter? Damage caused from burst pipes can cost you thousands, of dollars. Not all damage is covered by homeowner’s insurance. We want to make sure you know some simple steps to get you prepared. Follow these 7 simple steps to get off to a great start. Find yourself in a bind?
- Prepare your outdoor faucets. Remove and drain your water hoses and store them indoors before the first freeze.
- Fix leaks now. Inspect your pipes and have any/all leaks repaired.
- Wrap any pipes in unheated areas of the home. This is crucial, for mobile homes. Visit the hardware store and grab some heat tape and/or pipe insulation. There are also easy to install kits, that include a thermostat. These kits can help you in the event of frigid temps for long periods. Don’t hesitate to ask an employee for recommendations. Protecting the pipes in your home, from low temperatures is THE single most important thing that you can do.
- Tune up your water heater. You will want to drain and maintain your water heater at this time every year.
- Service your furnace. Make sure you have clean filters and call a professional to help with major repairs. Heat means pipes could freeze.
- Selling your home or heading south for winter? Shut off the water, in your home, completely and consider draining your pipes. Any water left in your pipes is at risk of freezing and causing pipes to bust. If nobody is home, the damage can be widespread and severe. Don’t take chances.
- Call SERVPRO at 423-745-4165.
Brogdon Plumbing Company. "7 Steps to Prepare Your Plumbing for Winter." BPC. Eternal Marketing Group. January 7, 2015
http://www.brogdonplumbing.com/prepare-plumbing-for-winter/
What To Do When Your Office Faces Water Damage
9/25/2019 (Permalink)
 Photo of a modern workspace in an office.
If you have ever faced water damage in your office, you may have some bad memories that accompany that instance. For example, you may have lost copiers, files, furniture, and a manner of other items of value due to water damage. You may have even had to close the doors of your business if you're a business owner, or if you're an employee, you may have had a period where you weren't able to work.
This water damage could have been a result of a leaky window, roof, or wall, or it could have been a plumbing malfunction or problem. Regardless how it happened, it more than likely caused a pretty big headache.
After the initial water intrusion problem was resolved, you may have had to deal with mold growth and other devastating effects of water damage in your office. So, what can you do to be better prepared in the event that your office was ever hit with water damage again?
First things first. With today's technological advancements, it's a great idea to back-up files and other hard-copy paper files to more than one location. Also, it's a great idea to stay up-to-date on your equipment warranties as well as renter's or owner's insurance on the office itself. If you have the ability to, it's also a great idea to work out a "Plan B" location for your co-workers or employees to meet in the event of office damage in the future. The possibility for remote work is far more probable now than in recent years.
Next, it's important to have a professional water damage and mold remediation team on hand that you can count on. You never know when water damage might strike your office, so knowing that you have a team of professionals on-call and ready to help should give you immense peace of mind going forward. You want someone to show up when you call with full confidence that your problem will be resolved quickly and efficiently.
Our local SERVPRO team is ready to help in the event a disaster like water damage were to strike you. Our team is more than capable to take care of your problems - large or small. You can count on us!
What To Do When Water Damage Strikes
9/4/2019 (Permalink)
 Water damage strikes a homeowner.
When a disaster strikes, it’s sometimes easy to feel overwhelmed and anxious while you’re waiting for the restoration process to begin. However, there are still things that you as a homeowner or business owner can do while we are on our way to help!
Here’s a super helpful to-do list that will help you stay on the right track:
- Safety assessment. First things first, make sure everyone under your care is safe and away from any potential danger the water damage has caused. If you have slick surfaces in your home or office, there could be potential trip hazards that should be addressed. Be sure to look for exposed wires or anything else that could cause harmful electrical shock or fire.
- Take stock of the damage. While it may be emotionally difficult to start this process, it’s important that you get it done. Try and take photos of all of the damaged areas and items affected by the water damage. If you can name each photo you take, put a description of the item, and an approximate value it has/had, you’ll be ahead of the game.
- Insurance. Times like these are when we tend to be most thankful for our insurance. This is the time when you need to reach out to your rep and explain what happened in detail. They will come out and assess the damage, and will proceed with aid they deem necessary to help get you back on your feet. If there has been significant damage or injuries, you may need to seek legal advice in handling future claims, etc.
- Begin Drying The Excess Water. After ensuring that your home or office is safe, you can re-enter and begin the drying process. If you have help that is physically able, move any furniture out of the way so that our team can come in and get to work quick!
Hang in there. We know disasters are never planned, and things can get scary fast. You can rest assured that your local SERVPRO team will be there fast to get the job done right. Together, we will get you back on your feet and back to life as normal.
5 Plumbing Repairs Every Homeowner Should Know
7/3/2018 (Permalink)
While the pleasures of homeownership are great, there will invariably be repairs along the way, especially when it comes to your hard-working plumbing. Some issues, such as fixing broken sewer lines, should certainly be handled by a pro; others, fortunately, are basic do-it-yourself jobs—no special tools or skills required. Check out five of the most common problems you’re likely to encounter and learn how to make short work of them with these plumbing repairs.
1. STOP A SWEATING TOILET TANK
Condensation on toilet tanks—the kind that ends up dripping into puddles on the floor—generally occurs after taking a long hot bath or a steamy shower. That’s when temperature and humidity levels in the bathroom are high, but the water in the toilet tank is still cool (between 50 and 60 degrees Fahrenheit), causing condensation buildup. Picture how a cold beverage develops droplets outside the glass on a sizzling summer day; the same thing is happening with your toilet tank.
To prevent the pesky problem, this plumbing repair involves installing an anti-condensation tank liner. You’ll find them in kits at DIY stores and plumbing-supply outlets for less than $20. The kit includes instructions and a large sheet of flexible foam, which you’ll cut to fit the inside of the tank. Depending on the brand, the liner will come with a peel-off backing or separate adhesive for installation. You’ll need to drain the tank and let it dry out before starting. Once the liner is securely in place (you may need to wait overnight for adhesive to set), it will form an insulating barrier between the cold water and the outside tank, and puddles will be a thing of the past.
2. REMOVE A SINK TRAP
Removing a sink trap—a P-, J-, or S-shaped pipe that connects to two other pipes beneath the basin—is often the key to common plumbing repairs like unclogging a sink, because that’s where most clogs lodge. Or if someone drops a ring or other valuable down the drain, you’re likely to find it caught in the trap. Follow the steps below to remove, clean, and replace a trap.
1. Position a pan beneath the plumbing pipes under the sink to catch the residual water that will drain out when you remove the trap.
2. Locate the trap that connects to the pipe that drops straight down vertically from the sink drain and the horizontal pipe called the “waste arm.” The trap is threaded on both ends and held in place with nuts. No need to turn off the water supply to the sink, just tell family members not to use the water while you’re working.
3. Loosen both nuts that secure the trap by twisting counterclockwise. You can often do this with your hands, but if a nut’s really stuck, use an adjustable pair of pliers—just go easy to avoid breaking the nut.
4. Detach the trap by pulling it downward. It should fall off easily; if not, pull and wiggle gently till it comes loose. Allow water to drain into the pan you’ve placed below the sink.
5. Scrape out any stuck debris you notice in the trap with an old butter knife, and then take the trap outdoors and spray it out thoroughly with a water hose to remove any sludge that might be coating the inside.
6. Reattach the now-clean trap by sliding it back into place and twisting the nuts that secure it clockwise with your fingers.
3. RE-CAULK A VANITY SINKThe plumber who originally installed your sink applied caulk around the edge to keep water from seeping between the basin and the countertop. Over time, however, this semi-solid waterproof sealant can deteriorate, harden, or crumble, allowing water to seep into the cabinet below, which can damage stored items and lead to mold growth.
To re-caulk the area around the sink, purchase a small tube of 100 percent silicone caulking that’s transparent or in a color that matches either the countertop or the sink. Then follow these steps for the DIY plumbing repair:1. Scrape away the old caulk with a plastic putty knife; a metal knife could scratch the sink or the countertop.
2. Wipe down the seam between the sink and countertop with a clean rag dampened with denatured alcohol. The alcohol will remove residual traces of soap scum or grime.
3. Let the area dry completely.
4. Apply a small bead of caulk, approximately 1/8” in diameter, all the way around the sink, keeping consistent pressure on the tube to create a uniform bead.
5. Dampen a fingertip with water and carefully run it along the bead of caulk, smoothing the caulk into the crease and forming a nice smooth groove. You may have to rewet your finger a few times.
6. Allow the caulk to dry completely before using the sink. Drying times appear on the caulk tube and average 12 to 24 hours.
4. FLUSH A WATER HEATER FLUSH
Mineral deposit buildup in your water heater can reduce the unit’s efficiency. By flushing your water heater every six months, you’ll extend its useful life and enjoy more hot water. You’ll find flushing instructions in the manual that came with the unit, and while models may vary slightly, for most the following steps are sufficient.
1. Turn off the power to the water heater. If it’s electric, shut off the breaker. If it’s gas, turn the gas off at the shut-off valve.
2. Turn a hot water faucet elsewhere in your house to “On,” and allow it to run until the water cools.
3. Attach the end of a standard garden hose to the drain outlet at the bottom of the water heater, and put the other end in a floor drain or a large bucket.
4. Turn off the water supply to the water heater. The shut-off valve is located on the pipe that connects the cold water supply to the top of the water heater.
5. Use a flat-head screwdriver to open the drain valve located on the drain outlet where the garden hose is attached. Water will begin draining out of the hose, along with built-up sludge and mineral deposits. Be careful to avoid getting splashed—the water will be very hot!
6. Close the drain valve with the screwdriver when water stops draining out, remove the hose, turn on the water supply to the water heater, and then turn the power back on.
5. FIX LOW WATER PRESSURE
It’s so frustrating when you want a strong, powerful stream of water but only a trickle comes out of the faucet! Fortunately, most water flow issues are an easy fix.
• First, check the water pressure at different faucets. If only one faucet is affected, the problem could be mineral deposits. Most faucets have either a small screen or a water-saving filter at the very end of the spigot that twists off. Remove the screen by twisting it off counterclockwise. If it’s clogged with debris, rinse it and reattach it.
• Showerheads are notorious for developing hard water deposits that can turn a refreshing spray into a disappointing dribble. If the low water pressure affects only the shower, remove the showerhead using a set of locking pliers to turn the nut that holds it in place. Soak it overnight in white vinegar, then rinse and reattach.
• Low water pressure at all faucets is a real red flag. Call your local municipality to see if work is scheduled on the water lines that supply your home, which could affect your pressure. If no work is being done, turn off all the faucets and any other water-using appliance, such as a dishwasher. Then check the water meter (usually located near the curb or alley). If the meter is turning, despite all your faucets being off, there’s a leak somewhere between the meter and your home. This indicates a serious situation and a plumber should be called immediately.
Source: https://www.bobvila.com/articles/plumbing-repairs/
It's Dry! Or is it?
6/25/2018 (Permalink)
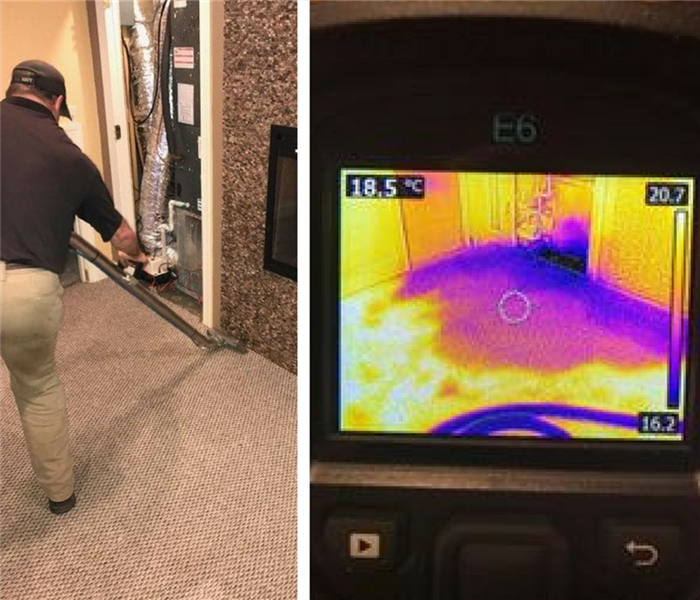 Infrared Camera Moisture Reading
Just because something looks dry, doesn't mean that it actually is. That's why we have our trusty infrared camera to help us determine moisture in deceiving areas. It's our job to make sure that, after a water loss, an environment isn't left behind for mold to move in.
How do we do this? We have moisture readers and infrared cameras to confirm where moisture is, which tells us where we need to extract and how long we leave our fans in place.
We want you to feel like the disaster 'never even happened,' so we use our best equipment to ensure you have the best experience.
Call SERVPRO of McMinn, Monroe, and Polk Counties today to take care of your home or business emergency! Call (423) 745-4165 and tell them Kodi sent you!
How To Prevent Water Damage
4/23/2018 (Permalink)
 How To Prevent Water Damage
Preventing water damage is a whole lot cheaper than paying for repairs. Here are three easy prevention tips.
KEY TAKEAWAYS
Clean your gutters.
Direct downspouts 5-10’ away from the house.
Test your sump pump once a year.
Fix all water leaks.
Replace missing roof shingles.
Water damage is the No. 1 culprit that weakens your home’s foundation and the very core that holds your house together.
You’ve heard about core strength for your body. Well, water damage hits at the core strength of your house, eventually causing serious structural damage. Damp wood invites termites and carpenter ants; plus, it causes mold and mildew.
Here’s how to prevent water damage using three easy strategies that will give you peace of mind the next time heavy storms hit.
#1. Ensure Good Drainage
Why it matters: Poor drainage weakens your foundation, causing cracks, uneven settling, and pathways for water to enter your home.
How to do it:
- Clean your gutters routinely. A clogged gutter will send cascades of water down the side of your house, damaging your siding and foundation.
- Ensure your downspouts direct water 5 to 10 feet away from your house.
- Make sure your yard is sloped at least 6 inches over a 10-foot span away from your foundation. That slope keeps water from getting down right next to your foundation, where it could cause walls to lean, crack the masonry, and create leaks. (For crawl spaces, keeping water away makes sure excess water doesn’t pool underneath your floor, making for damp conditions that encourage mold, rot, and insects.)
- But don’t let the soil get too dry, either. Long dry spells let the soil around your house dry out and shrink. A big rain may make the soil expand, putting pressure on your foundation walls. In a drought, run a soaker hose at least 6 inches from the foundation and 3 inches under the soil to keep the soil from contracting and expanding.
Maintenance cost: Very little. Cleaning gutters can be a no-cost DIY job, or you can hire a pro for $50 to $250, depending on the size and height of your home. To get the soil slope you need, you might have to buy some additional topsoil.
Worst case if you put it off: Your foundation could settle, cracking your basement walls. The cost to stabilize, repair, and seal deteriorated foundation walls is a whopping $15,000 to $40,000.
#2. Test Your Sump Pump Regularly
Why it matters: Sump pumps come to life during storms. That’s not when you want to realize yours isn’t working properly. You should check it at least once a year, and ideally perform several checks during heavy storm seasons.
How to test your sump pump:
- Slowly fill the sump pump pit with water. Watch for the “float” (similar to the float in your toilet) to rise, which should turn on the pump. Then watch to make sure the water level falls.
- Test your backup pump the same way, but unplug the main pump first.
- If you don’t have a backup pump — or a generator — and are on municipal water, get one that runs on water pressure. If you’re on well water, your only option is the battery kind.
Maintenance cost: Testing is free; a water-powered backup sump pump, including installation, costs $150 to $350; a new battery for a battery-operated sump starts around $200.
Worst case if you put it off: Your basement could flood, ruining everything in it, including drywall and carpeting. (Did you know your regular insurance doesn’t cover flooding?) Plus you run the risk of mold and mildew — which can also be a very expensive problem.
#3. Check for Water Leaks and Fix Them
Why it matters: Persistent leaks lead to mold and mildew, rot, and even termites and carpenter ants (they like chewing soggy wood, since it’s soft). Yet if you fix a leak soon after it starts, there may be no long-term damage at all.
How to check for leaks:
- Check for dark spots under pipes inside sink cabinets, stains on ceilings, toilets that rock, and of course drips.
- At least once a year, inspect your roof. Repair missing, loose, and damaged shingles. Repair any cracked caulking and check for leaks around flashing.
Maintenance cost: Negligible for a simple fix, such as a new washer. A visit from a plumber might set you back $250; a roof repair, a few hundred dollars to $1,000.
Worst case if you put it off: Drips ruin the cabinet under the kitchen sink, and run down into the floor sheathing and joists underneath, so you need a structural repair, plus new cabinets and new kitchen flooring. Or the roof rots, so you need a new roof and repairs to rooms directly beneath.
So now you know how to prevent water damage — and add years (and lower maintenance costs to your home!).
Source: https://www.houselogic.com/organize-maintain/home-maintenance-tips/how-to-prevent-water-damage/
Tips on Stopping a Leaky Toilet
3/5/2018 (Permalink)
 Tips on Stopping a Leaky Toilet
Got a leaky toilet? Believe it or not, it’s a common problem. Continue reading to find out the likeliest causes and the easiest ways to remedy the situation.
First, some of the washers between the bowl and tank may have failed. Shut off the supply valve, empty the tank with a flush, then remove the nuts, bolts, and washers from the underside of the tank. Lift the tank, position it on its side, and see if the washers need replacing.
Another culprit may be faulty fasteners securing the fill valve and ballcock to the bottom of the tank. Before you replace those parts, however, first try simply tightening the nuts and bolts holding them in place—that often solves the problem.
On the other hand, if the leak seems to be coming from the base of the tank, chances are the wax ring that seals the toilet to the floor has failed. Replacing the wax ring is a much bigger job, since it involves removing the entire toilet from its base. If you decide to replace the wax ring yourself—preferably with a friend to help with the lifting—take the extra step of also replacing any bolts that show signs of corrosion. And, once you have the toilet back in place, don’t forget to add a bead of caulk around the base.
Source: https://www.bobvila.com/articles/toilet-leaking/#.Wnxo75M-e35
7 Steps to Prepare Your Plumbing for Winter
10/30/2017 (Permalink)
 Tips to prepare your pipes for winter.
Simple Steps to Prepare Your Plumbing for Winter
Have you prepared your plumbing for winter? Damage caused from burst pipes can cost you thousands, of dollars. Not all damage is covered by homeowner’s insurance. We want to make sure you know some simple steps to get you prepared. Follow these 7 simple steps to get off to a great start. Find yourself in a bind? Brogdon Plumbing is here to help! Give us a call.
- Prepare your outdoor faucets. Remove and drain your water hoses and store them indoors before the first freeze.
- Fix leaks now. Inspect your pipes and have any/all leaks repaired.
- Wrap any pipes in unheated areas of the home. This is crucial, for mobile homes. Visit the hardware store and grab some heat tape and/or pipe insulation. There are also easy to install kits, that include a thermostat. These kits can help you in the event of frigid temps for long periods. Don’t hesitate to ask an employee for recommendations. Protecting the pipes in your home, from low temperatures is THE single most important thing that you can do.
- Tune up your water heater. You will want to drain and maintain your water heater at this time every year. It’s a little harder to do yourself but we are glad to help! Just give us a call.
- Service your furnace. Make sure you have clean filters and call a professional to help with major repairs. Heat means pipes could freeze. If they do, call us!
- Selling your home or heading south for winter? Shut off the water, in your home, completely and consider contacting us to drain your pipes. Any water left in your pipes is at risk of freezing and causing pipes to bust. If nobody is home, the damage can be widespread and severe. Don’t take chances.
- Call Brogdon plumbing! If you have questions or concerns, contact us for help. We will gladly help with your winter pipe preparations!
What else can you do to prepare your plumbing for winter? Share your personal tips/tricks with us.
Source: http://www.brogdonplumbing.com/prepare-plumbing-for-winter/
7 Tips for preparing your home for winter!
9/20/2016 (Permalink)
Simple Steps to Prepare Your Plumbing for Winter
Have you prepared your plumbing for winter? Damage caused from burst pipes can cost you thousands, of dollars. Not all damage is covered by homeowner’s insurance. We want to make sure you know some simple steps to get you prepared. Follow these 7 simple steps to get off to a great start. Find yourself in a bind? Brogdon Plumbing is here to help! Give us a call.
- Prepare your outdoor faucets. Remove and drain your water hoses and store them indoors before the first freeze.
- Fix leaks now. Inspect your pipes and have any/all leaks repaired.
- Wrap any pipes in unheated areas of the home. This is crucial, for mobile homes. Visit the hardware store and grab some heat tape and/or pipe insulation. There are also easy to install kits, that include a thermostat. These kits can help you in the event of frigid temps for long periods. Don’t hesitate to ask an employee for recommendations. Protecting the pipes in your home, from low temperatures is THE single most important thing that you can do.
- Tune up your water heater. You will want to drain and maintain your water heater at this time every year. It’s a little harder to do yourself but we are glad to help! Just give us a call.
- Service your furnace. Make sure you have clean filters and call a professional to help with major repairs. Heat means pipes could freeze. If they do, call us!
- Selling your home or heading south for winter? Shut off the water, in your home, completely and consider draining your pipes. Any water left in your pipes is at risk of freezing and causing pipes to bust. If nobody is home, the damage can be widespread and severe. Don’t take chances.
- Call SERVPRO of Athens Tn, at 423-745-4165.
Brogdon Plumbing Company. "7 Steps to Prepare Your Plumbing for Winter." BPC. Eternal Marketing Group. January 7, 2015
http://www.brogdonplumbing.com/prepare-plumbing-for-winter/


 24/7 Emergency Service